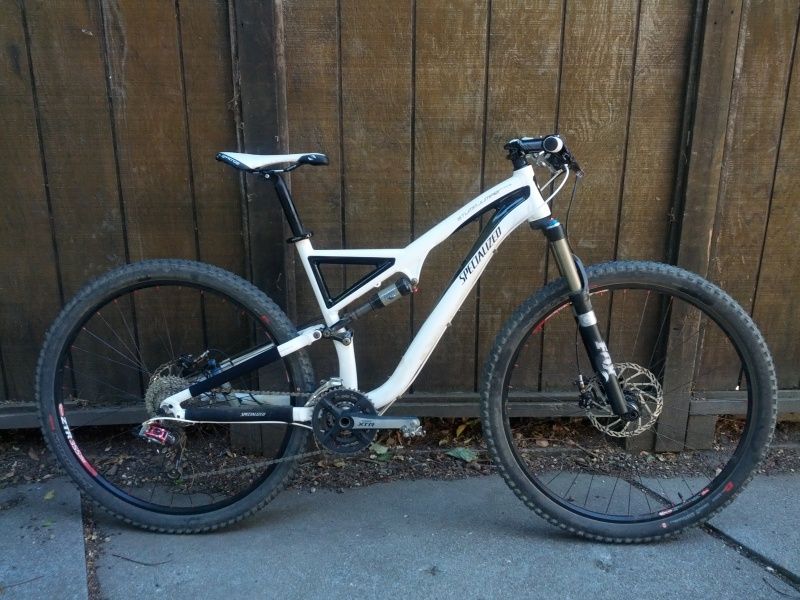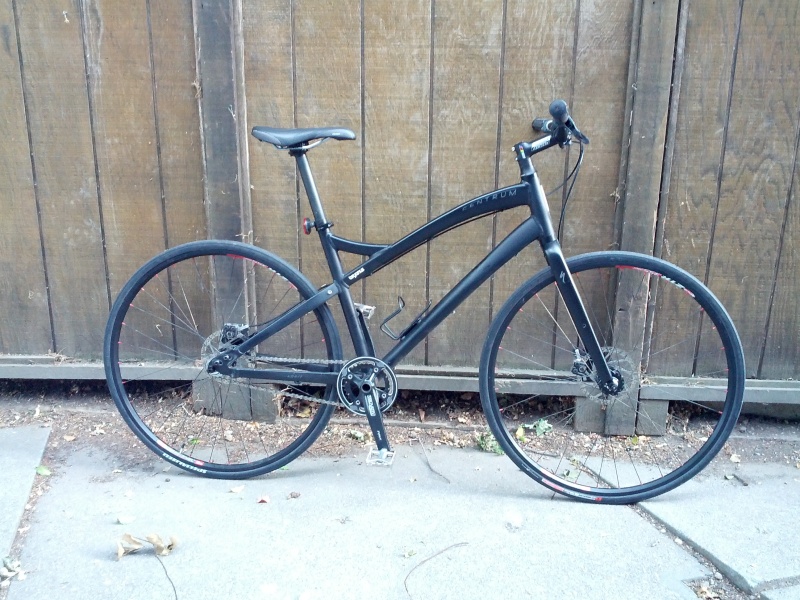
I don’t know why, but the first time I saw this bike in Specialized’s catalog, I wanted one. I thought it’s be a cool “city” bike for commuting or whatnot.
I don’t think they sold very many of them, as they killed the design/model after just one year. I think it was Specialized’s reaction to the success of Cannondale’s Bad Boy series of urban bikes.
I got this one off of craigslist a few years ago, and proceeded to swap out the parts as I do with all of my bikes it seems.
Now, the only stock parts left are the headset and brakes! Also, it was originally a 26er…turns out 29″/700c wheels fit just fine with lower-volume tires..
I would say this bike (like the Bad Boy) was actually designed to handle both wheel sizes, as the geometry seems largely unaffected by the increase in wheel size.
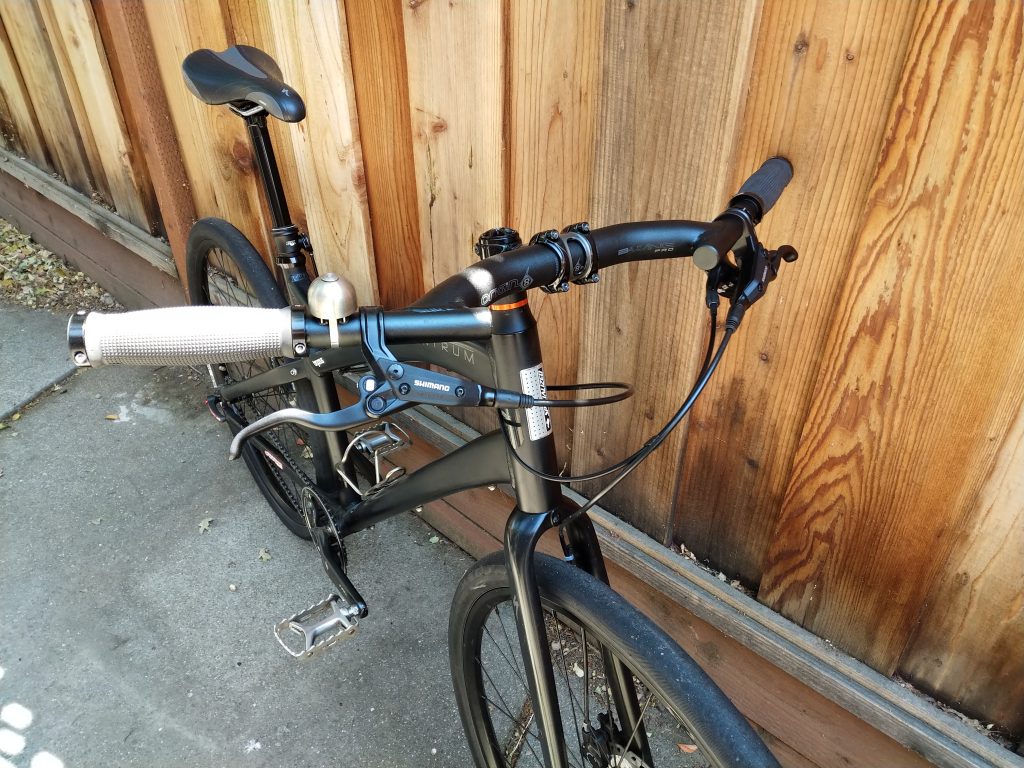
- Chris King 29er ISO disc wheelset, with Stans 355 rims and Specialized 25c Rouxbaix rubber
- Specialized low-riser bar and seatpost, with Format SL saddle
- Ritchey WCS stem
- Truvativ FireX crankset
- 21.2lbs with pedals
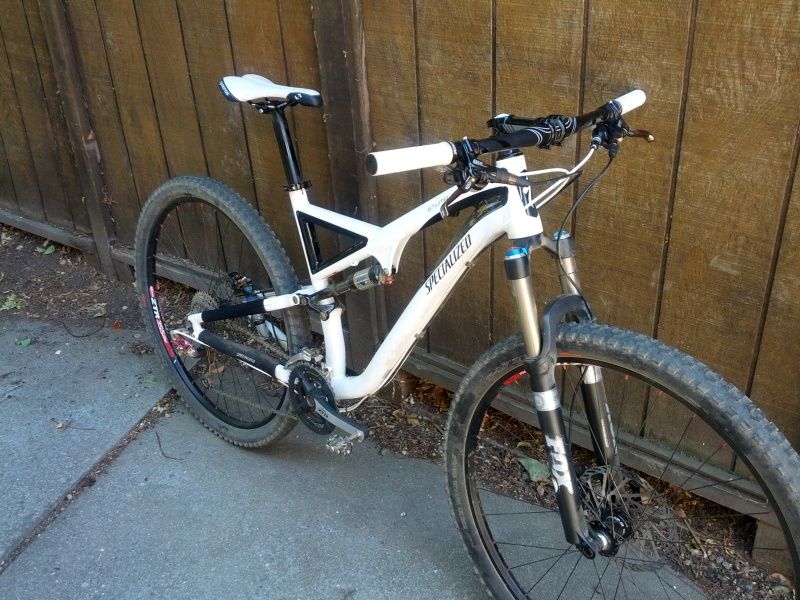
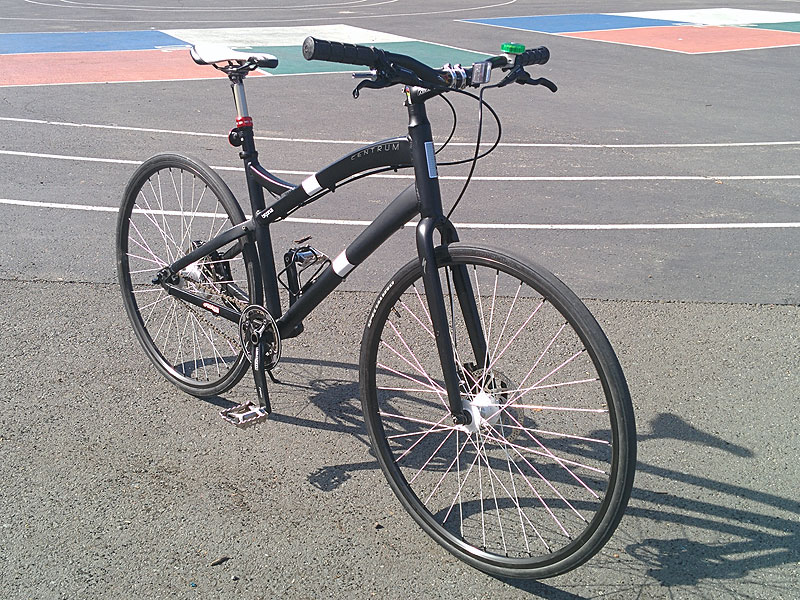
Lastest updates:
- Shimano hydraulic disc brakeset/levers
- DiamondBack OEM 29er wheelset (sold the Chris Kings)
- KS Supernatural Dropper Post with Joplin remote (the 29er wheels make it a bit too tall to put my feet on the ground when stopped; the dropper is a sweet solution!)
- Kickstand!
Future updates?:
- I’d like to find an internally geared hub and turn it into a 7 or 8-spd bike. Or maybe find a compatible derailleur hanger, but I don’t think one exists for this frame.
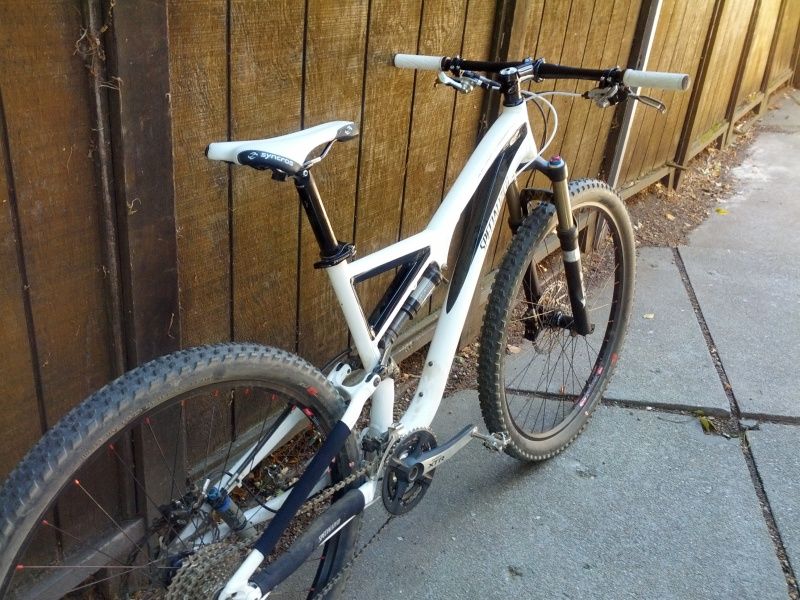
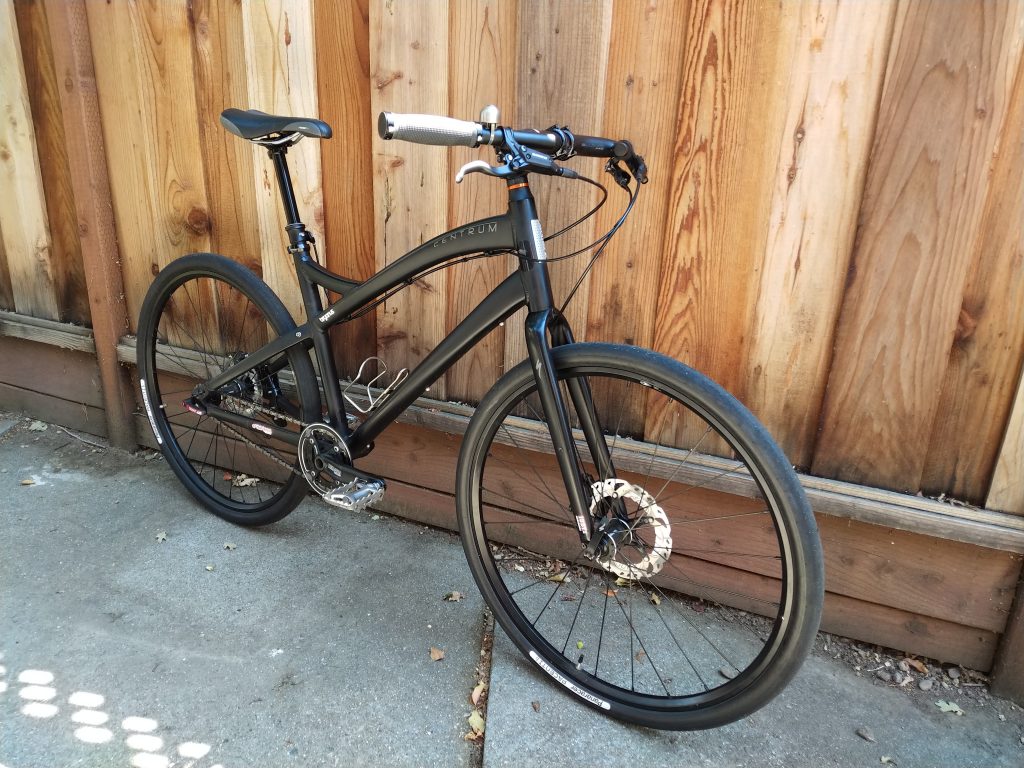
Latest build 06/17:
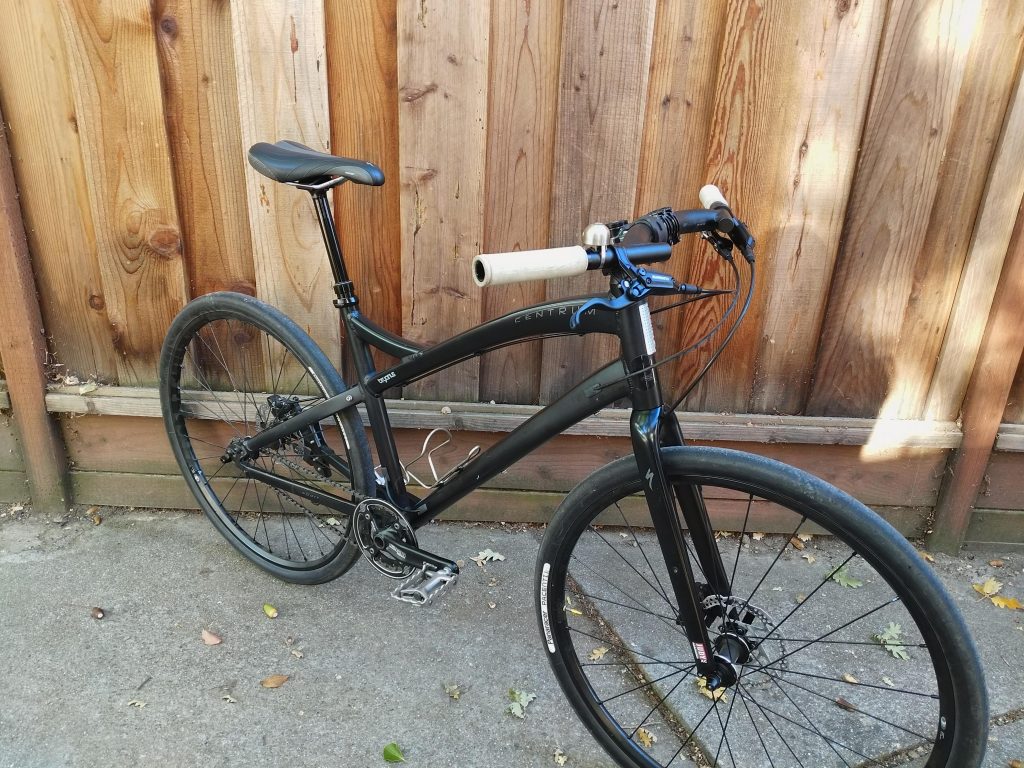
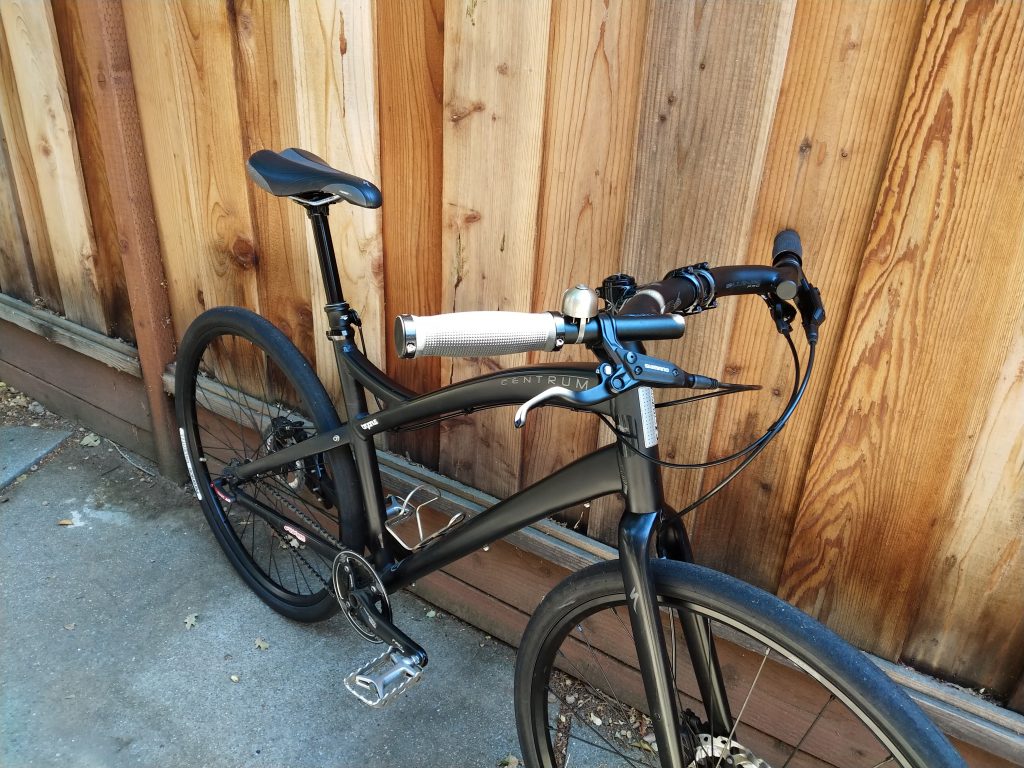
The Centrum has become my ‘city’ bike and sits in my office for occasional lunchtime runs, etc. The LEV was pretty unreliable, so I got rid of it and put on a Specialized Command Post instead. I’ve had a couple of those posts and they have never given me any issues.
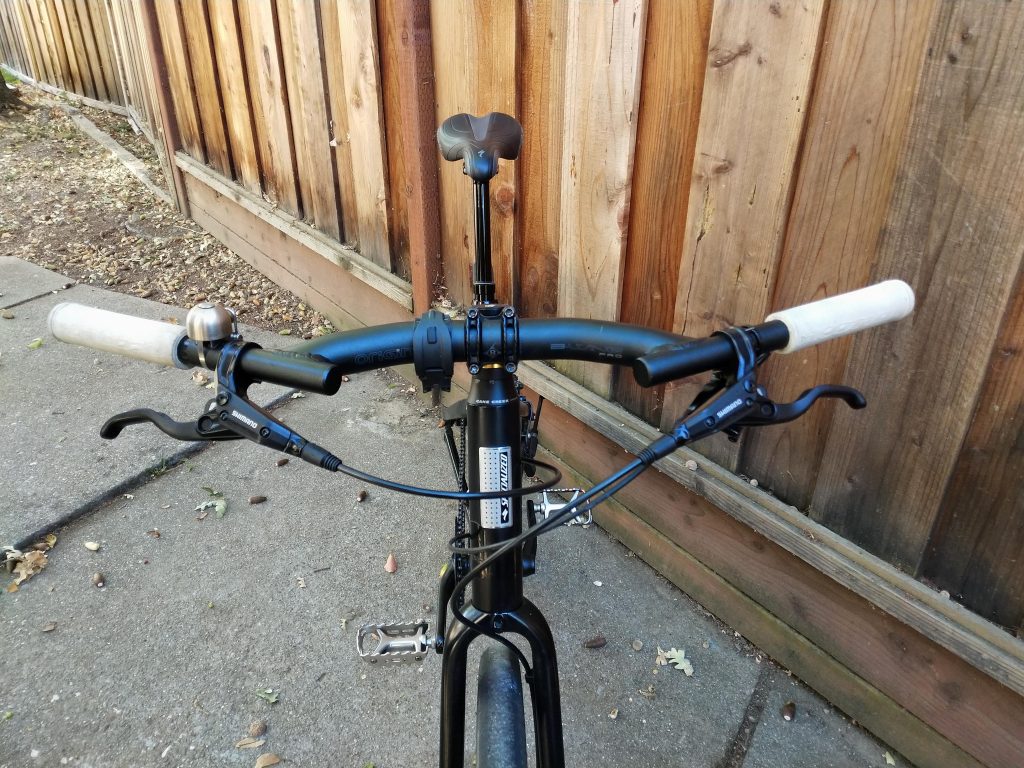
The bars were swapped out with some FSA Metropolis mustache bars. And for grips I used some old bar tape.
Seems I lost a part of this post with a recent server migration, but I ended up selling the CK wheelset and setting it up with a set of Shimano 650b wheels, which lowers the bike back down a bit.

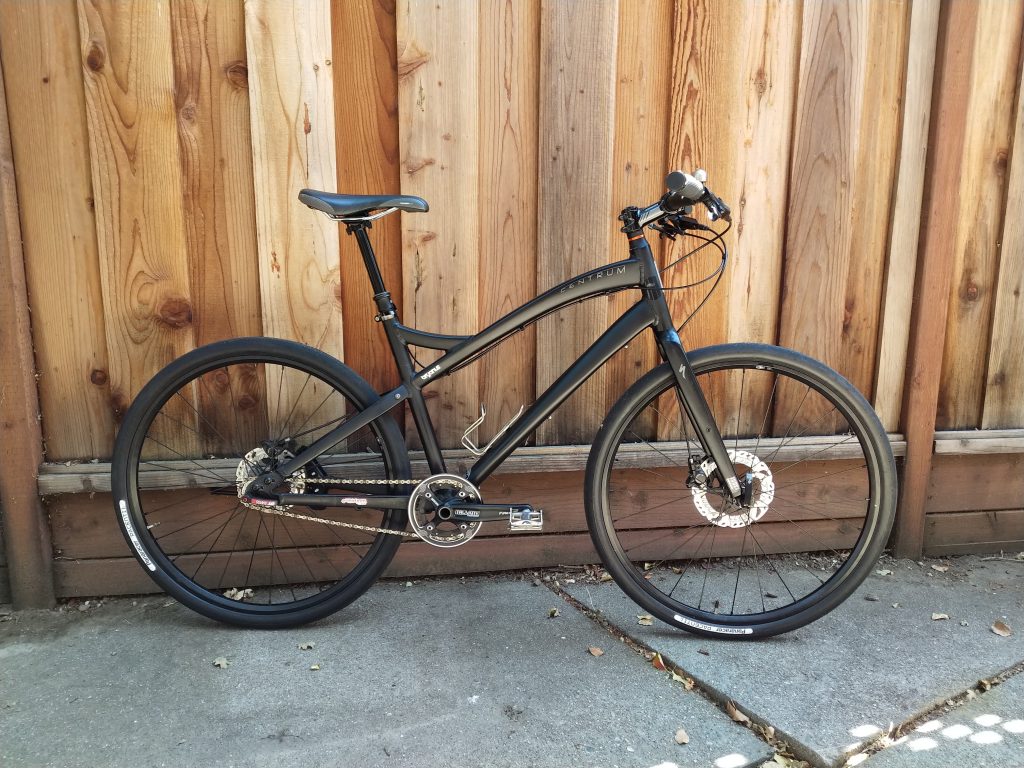
Update 07/23/2018:
Latest build/changes:
- new rubber! Panaracer Parimoto 650b x 42c tires w/ Gravel King casing (made in Japan!) – Waaay wider and makes it feel more like a cruiser than a hybrid.
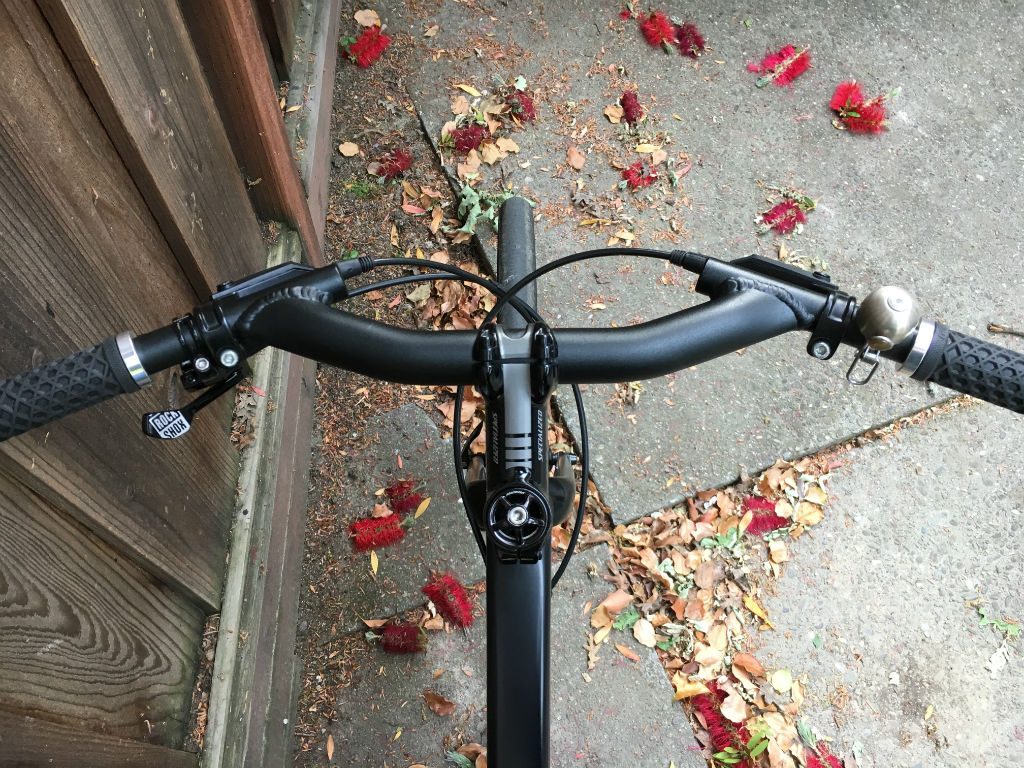
- Origin8 Bat Wing bars
- Fox Transfer Performance 125mm dropper w/Specialized SRL lever
- XTR 180/160mm Freeza centerlock rotors (spares from my MTB)
- Thomson seatpost collar
- Spurcycle bell
- Looks Legit!
Even Moar updates! 05/05/2019:
- Changed grips to ODI Vans waffle lock-ons
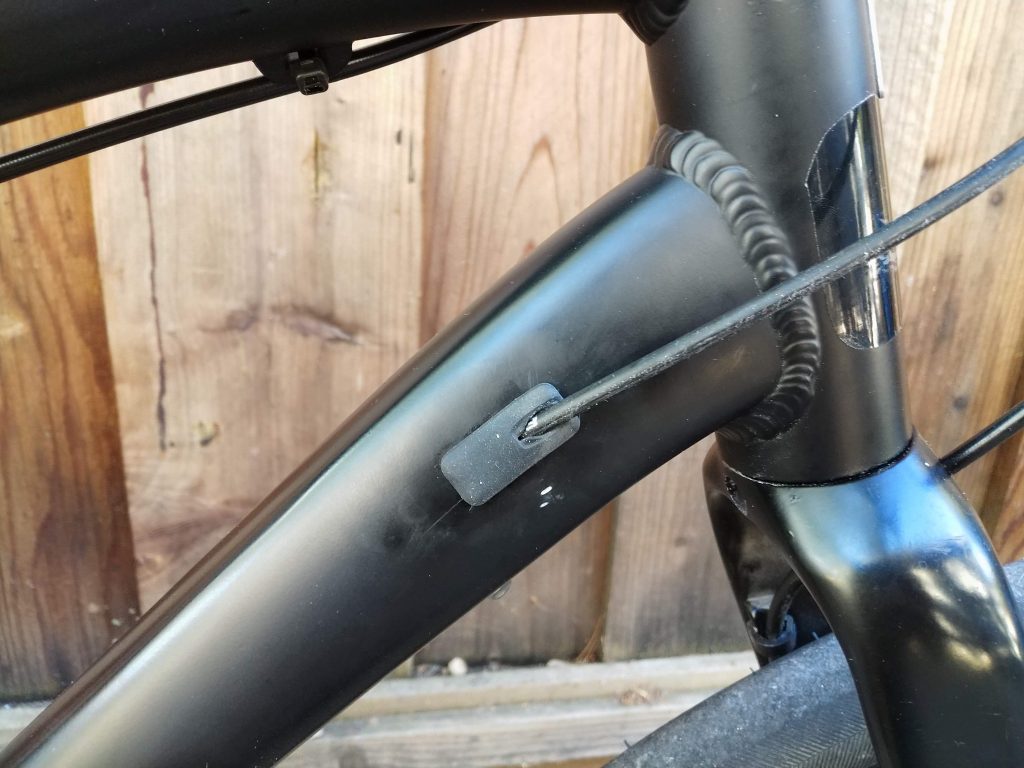
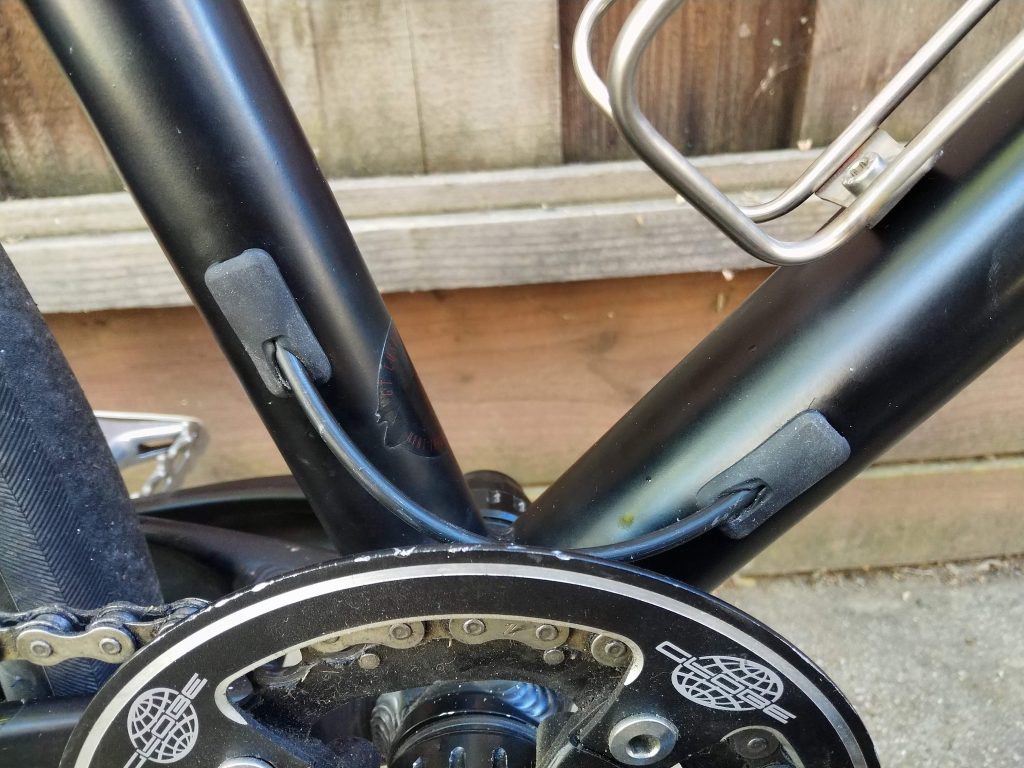
- Swapped the Fox Transfer external dropper for an INTERNALLY-routed Reverb Stealth 150mm! I ordered some frame plugs off of eBay and decided to go for it. Not the best work I’ve done, but it works and looks trick! Hardest part was getting the plugs into the holes as I undersized them to make sure they would fit tightly. Pretty sure my Centrum is unique with the internal routing! Lovin’ it!
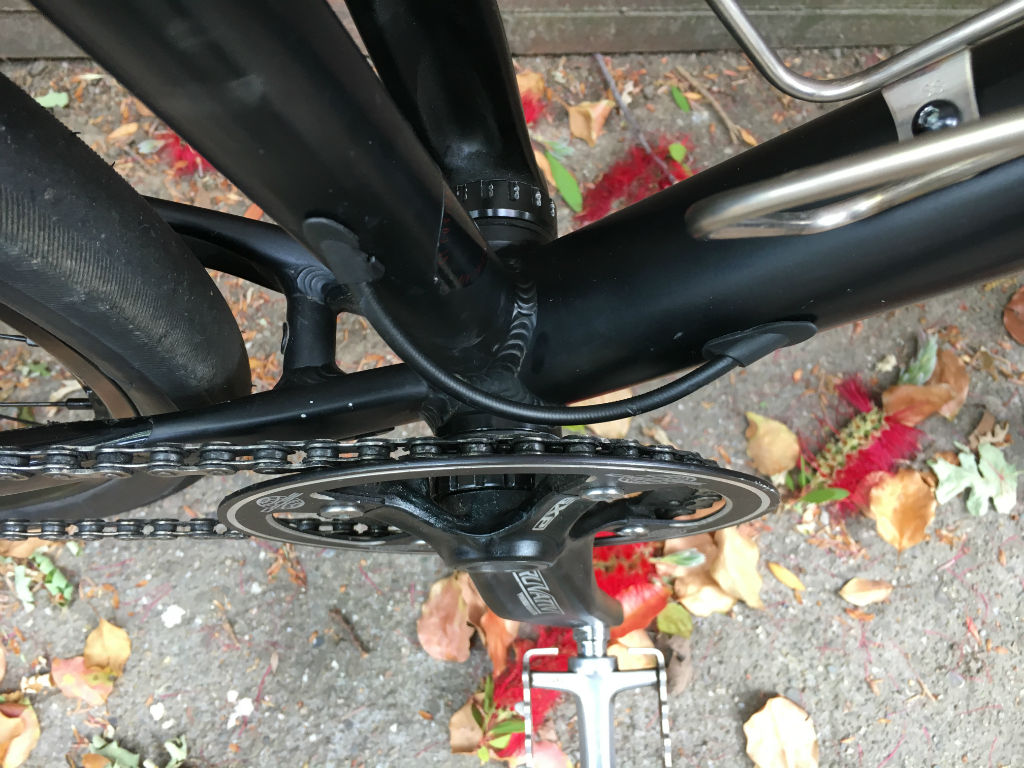
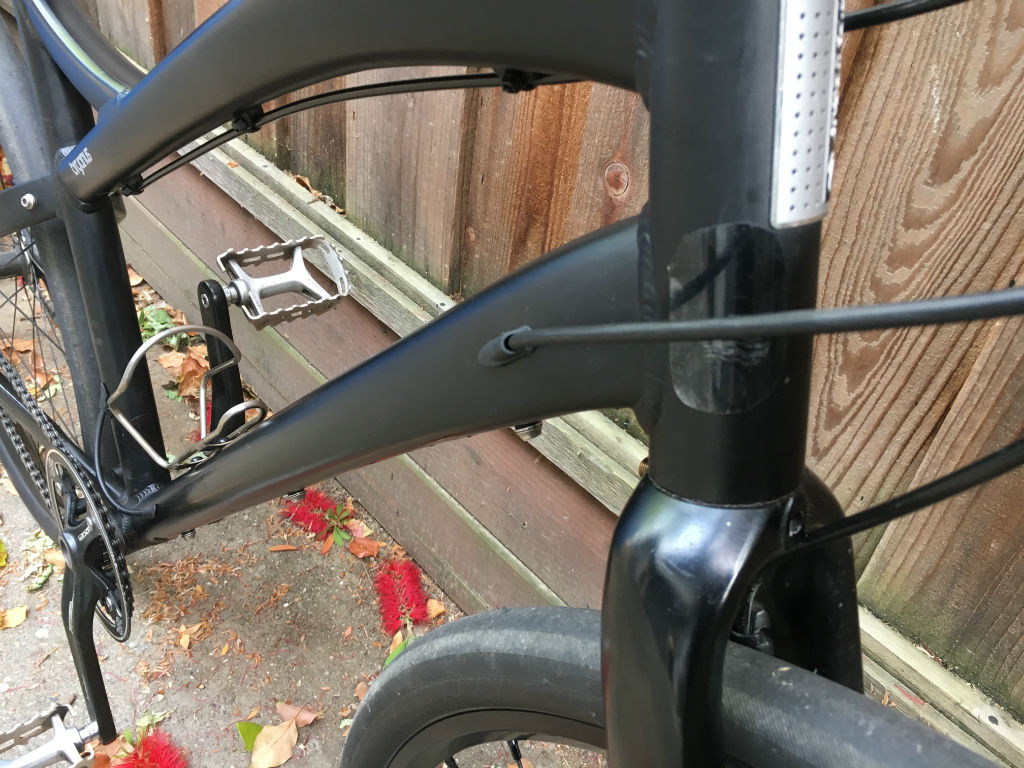

In retrospect, I think I should have put the routing holes on the non-drive side as the housing could potentially rub the chainring/front derailleur if I had a multi-ring crankset (which I’m not really planning on adding, but you never know!). I originally wanted to route the holes in the center of the tubes, so just beneath the water bottle cage and back into the seattube where the sticker is. But the problem with that is I wouldn’t be able to fit my drill in such a tight space. I’m glad I thought about that before I started drilling!
Latest updates! 10/12/2019
The frame plugs from eBay (China) were total shite. They were too brittle and cracked into pieces. I decided to order some rubber frame plugs made by Giant. They were only $1.50 each and I needed 3 of them.
I had to dremel/file the holes to be larger, but the plugs are soo much nicer. They are flexible and fit snugly and the cable housing is held securely.
I also changed out the Reverb for a OneUp 150mm dropper. Oneup is my new favorite dropper post. It’s super smooth and much easier to deal with than the Reverb. The lever action is also considerably lighter to depress than the Reverb remote.
One change that isn’t in these photos is a fork swap to a 2009 RockShox SID Race. Although it was a 26″ fork, it fit my 650b wheels just fine with plenty of clearance. It’s also very easy to reduce the travel in those forks, so I dropped it down to 60mm. I rode it this way for a few months, but ultimately sold off the fork since it was relatively rare with it’s v-brake lowers. It was sort of an interesting experiment, and it made the bike feel more like a proper gravel bike, akin to having a Fox AX gravel fork but with 60mm of travel on it. Another small fitting change was to swap out the 90mm Specialized stem for a Syntace 60mm one.